Right, first of all, the best resource you can have for this job is the RockShox technical manual available from their website. This outlines how to do all the stuff i've outlined here - just without the comedy pics.
You will have to order a seal tool, replacement 32mm seal kit, 5wt oil and 15wt oil. I got mine from fisher outdoor via Halfords.
Make sure as you go that you clean everything (in fact, thats what most of the time taken by this job is doing) with meths or just a clean paper towel.
TOOLS:
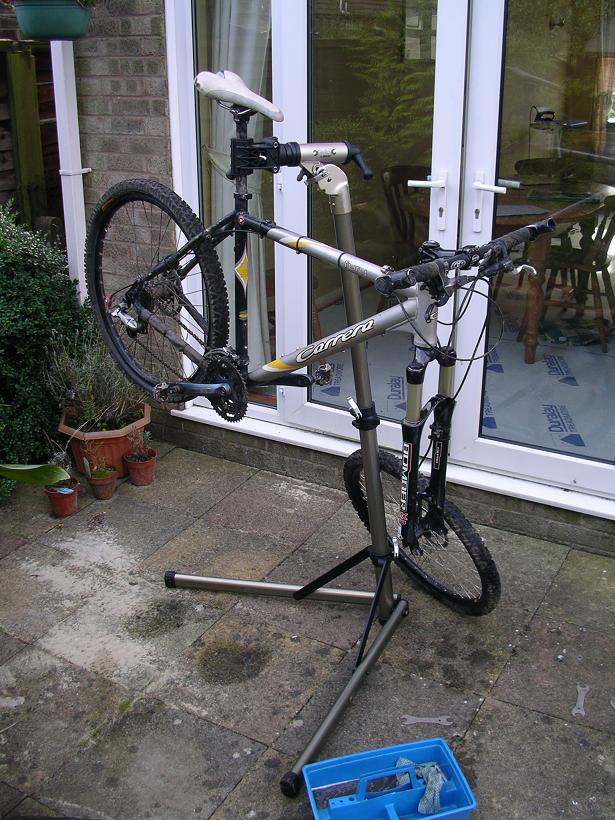
Repair stand
24mm Deep Socket
Breaker bar/Ratchet handel
5mm Socket/allen key
2.5mm allen key
Grease
15wt fork oil (30ml's)
5wt fork oil (120ml's)
Replacement seal kit
RockShox 32mm seal tool
Plenty of clean rags/paper towels
Circlip pliars
OPTIONAL TOOLS
Small torque wrench
Meths
Alternative circlip pliars (You can manage with just one type of circlip plier but both internal and external would be best.)
Replacement o-rings
Zip Ties.
A WORD ABOUT BUSHINGS
First job is to check your forks for play in the bushings. If you lock the front brake and rock the bike backwards and fowards gently and feel play then it could be the bushings. But don't panic - there is a strong chance that the headset is loose or its bearings are knackered which is much easier to put right. It isn't even that benign sometimes as the tyre will move slightly and also the brake pads will often rock backwards and fowards inside the caliper (or the calipers will move slightly if you're kicking it old-skool with v's.) If the bushings are buggered, then its time to send it to Tim Flooks/Fisher Outdoor etc. If you're not sure if the bushings are worn then you probabbly shouldn't attempt this job and send the forks to a service center - even though you may have to fork-out (hehe) a bit of cash for it. If the bushings are worn, then I recomend sending them to a service centre too as tools to remove and reinstall bushings will set you back about £200. However, if you take care and service your forks reguarly then you should not need to do this for years.
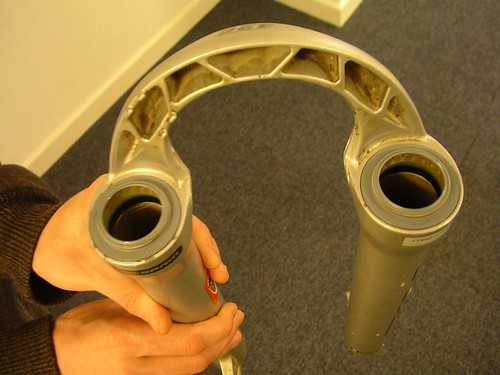
REMOVING THE FORKS FROM THE BIKE
Next, remove the forks from the bike. Remove the front wheel and take off the front brake caliper from the two IS mount bolts (likely to require a 5mm allen key). Remove the top-cap from the steer tube above the stem and then loosen the pinch bolt(s) of the stem and remove the stem and handlebars. Tie the bars to the frame. At this point make sure you've got a firm hold on the forks as they can just drop out at this point, although mostly they don't and require a bit of persuasion from your tapping-stick (hammer). My headset is an FSA Pig which has a split-tapered ring which secures the top of the steer tube to the headset and to remove this I had to tap the steer down (quite hard, making sure to support the frame at the same time - don't make your repair stand take the force) then hold the forks up a little to separate the top cap from the bearings then tap the top cap down away from the silver tapered-ring. Your forks should now just drop out of the headset/frame.
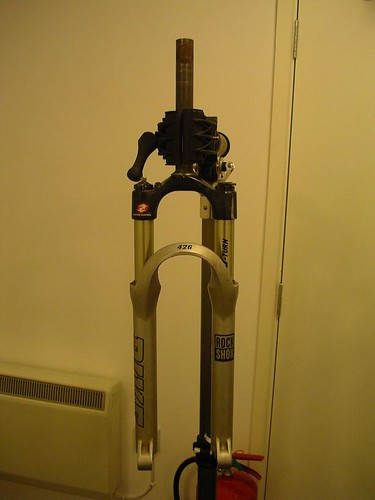
Remove the bike from the repair stand and put the forks in.
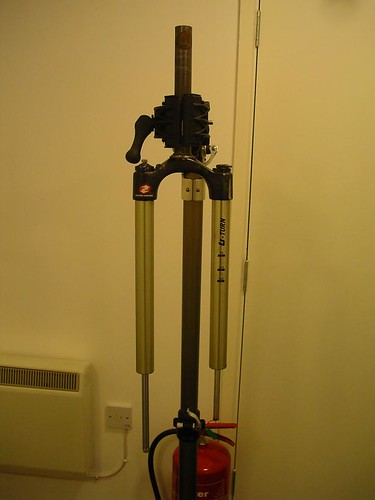
LOWER LEG REMOVAL
First Job is to take off the lower legs. Make sure you've got a washing-up bowel or similar underneath the forks at this point.

Remove the rebound adjuster on the drive-side of the fork. Mine fell out ages ago and now I simply adjust my rebound with an allen key, but if you've got a red anodised knob at the bottom of one fork leg then you can just pull that streight out. Undo the bolts at the base of each fork leg by three of four turns and then tap each with your stick to separate the internals of the fork from the lower legs. At this point a load of oil fell out of the bolt holes into my bowel surprising me somewhat. (Glad I put that there.) Loosen off the bolts fully and remove. The lowers should now slide off the fork with some encouragement.
SEAL REPLACEMENT
Rockshox do a special tool for replacing seals on 32mm stantions (like Pikes) and trust me - you cannot make do without it. I suspect if you tried then you would seriously bugger your new seals or lowers or both. Remove the grey outer seal using a flat screwdriver. (All the seals are pretty tough to get out. Use a cloth to protect the lower and leaver against the opposite side of the opening from the side you are trying to prise off.) The yellow fome rings should just fall out. The black oil seals also need to come out - these were the hardest to get out of all for me.
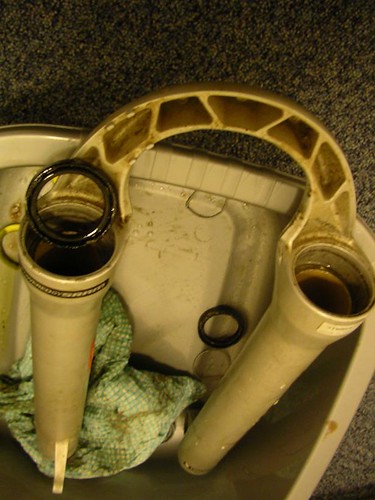
Pop a tiny bit of 15wt oil in a small jug and chuck your new yellow foam rings in there to soak. Use the RockShox seal tool to force in the black oil seals. (They are quite a tight fit and require a bit of force.) Make your your foam rings are properly soaked and chuck them in above the oil seals. Finally use the other end of the tool to push in the new grey outer-seals.
MOTION CONTROL AND REBOUND DAMPENER SERVICE
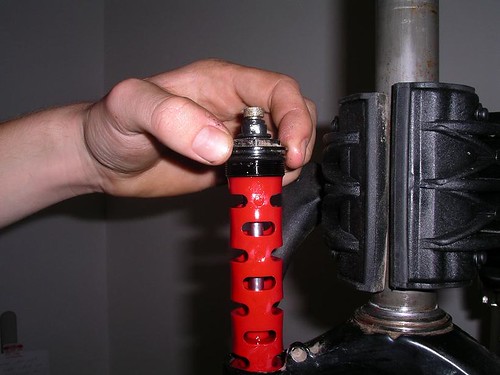
Using external circlip pliars, remove the small circlip from the top of the compression adjuster. On newer models the compression adjuster is anodised blue, but on older ones it is black with blue symbols. Basically its your lockout. With the little circlip off you should be able to just pull the knob streight off over the gate adjuster. Now take a 24mm socket and breaker bar/ratchet handle and undo the motion control assembly. This is pretty stiff at first because of the o-rings in the system, but they are basically easy to take off and not really torqued tightly. I found that my 24mm socket would only just fit over the gate adjuster, so I would recomend an extra-deep socket if you can get one. With the assembly loosened you should be able to pull the unit out to reveal it in all its bright-red glory.
Take the forks out of the stand and chuck the old fluid in your waste bowel. Inspect the assembly's o-rings. Rock shox recomend replacing them applying some oil to the new ones, but I didn't bother because they seemed in good condition and I didn't want to get the wrong size so I just put a blob of the relevant suspension oil on all the existing ones. You can find loads of o-ring sized at Halfords in small blister packs for about £1 for a few of various sizes. At the bottom of the fork stantion there is a circlip recessed inside stantion. Use internal circlip pliars to remove it. (I only had external circlip plairs, which worked, but it was a bit trickey.) Pull down and remove the rebound dampener assembly, isnpect this as with the motion control assembly replacing o-rings where necessary, clean and apply a blob of 15wt to the o-rings.

Reinstall the rebound dampener assembly replacing the circlip. Make sure not to damage this - its a bit delicate. Using a syringe, put 120ml's of 5wt oil into the top of the stantion. Replace the cleaned motion control assembly and torque with your 24mm deep socket to about 8-10Nm. Replace the anodised cap and circlip.
SPRING SERVICE
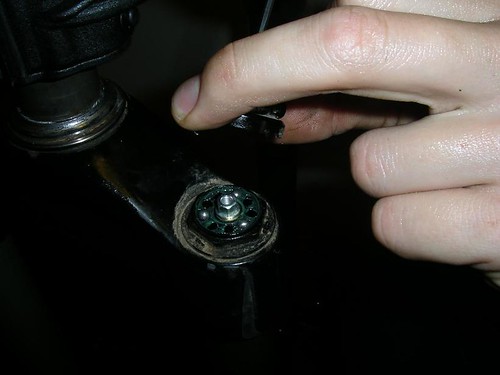
Using a 2.5mm allen key, undo the top of the u-turn adjuster. Remove this cap to reveal 3 ball bearings.
Using your 24mm socket, undo the top of this stantion. Remove the spring...
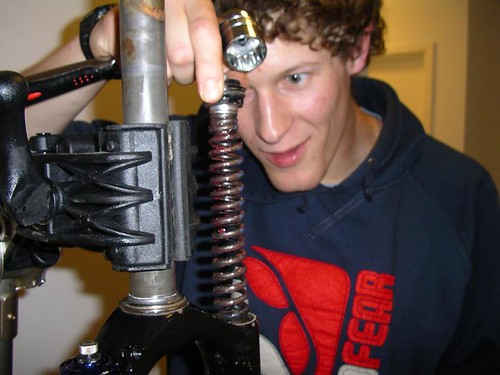
...clean it, inspect the seals, regrese it all and pop it back in. Do the top up to about 8-10Nm as before. Put a blob of grease on each ball beaing and replace the top cap of the u-turn adjuster with your trusty 2.5mm allen key.
LOWER LEG INSTALLATION
Take your lowers with new seals attached and very carefully slide them onto the stantions. This was probabbly the most difficult bit for me as I found it hard to get them both on without the outer seal folding over. Try and bribe a mate to help.
Invert your forks (turn them upside down) with the lowers facing the sky.

You may want to lower your stand for this.
Don't make the same mistake as me and try to do your bolts up first. (You won't be able to put any oil in! Good to know that the seal here is good though.) Pop in 5ml's of 15wt fork oil into each leg. This is a seriously small ammount and it made me wonder if i'd done it right - but I actually used too much (my forks now won't come close to bottoming out!) [EDIT: I HAVE BEEN INFORMED TO USE 15ML'S NOW AS OPPOSED TO THE 5ML'S - PERSOANLLY I'D GO WITH 15ML'S AS 5ML'S JUST SEEMS LIKE NOT ENOUGH!] NOW re-install the bolts at the base of the fork lowers making sure the crush-washeres are not too broken. Again, torque with a 5mm allen key to about 7Nm. Replace your red anodised rebound adjuster.
REINSTALL
Now is probabbly a good time to change the bearings in your headset if they are loose (caged) ball bearings. I did this. Also a good idea to have your maxel appart, clean it and the wipe down with an oily rag. Reverse the procedure above to reinstall the forks. Make sure there is no fork oil about to contaminate your brakes!!!
AFTERMATH
Go for a bit of a street ride poping off some stuff to flat concrete to test the forks. Followed by beer. :)
Thanks to my flat-mate Adam for some of the pics.